Add a new Sale Type:
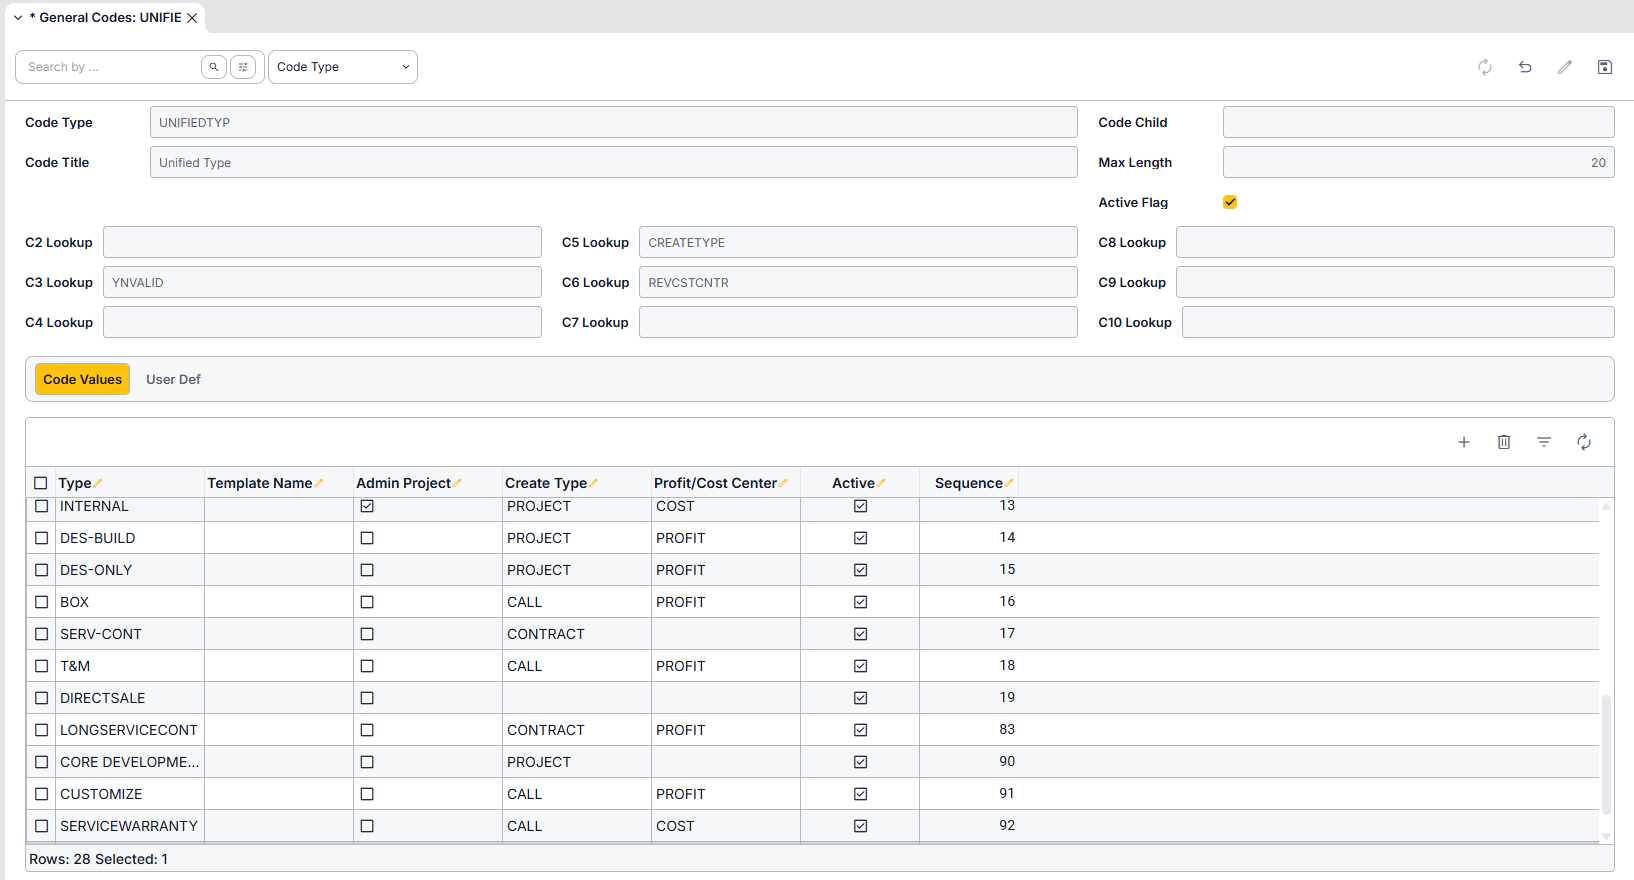
- Go to Maintenance Menu > General Codes
- Search for UNIFIEDTYP in the General Codes form. A list of existing Unified Type Code Values will display in the grid
- Put the grid in EDIT mode and click the ADD button. A new blank row will appear at the bottom of the grid.
- Enter information on the new row:
- Type: Determines the values that may be selected from the Sale Type drop down menu on a Opportunity, Quote, or Order
- Optional – Template Name: If the new Unified Type is intended to create a Project from a Template, specify a Project Template Title that will be used when approving the Order. Note: Q360 will NOT prompt you to select a Template upon approving the Order
- If the new Unified Type is intended to create an Admin Project, select Y in the Admin Project column to indicate that the resulting Project should be Internal
- Create Type: indicate what should be created when an Order is approved. Options include Project, Call, Contract (Service Contract), or Blank (will remain as an Order only)
- Profit / Cost Center column: Set this to Profit if the Unified Type is a type of sale to customers, or Cost if this is an internal sale type
- Active column: Check the box if the selected type should be displayed in the Sale Type drop down menu of the Opportunity, Quote, and Order forms
- Sequence field: determines the order in which Type options appear in the Opportunity, Quote and Order Sale Type drop down menus. This option is purely aesthetic.
- Click SAVE icon
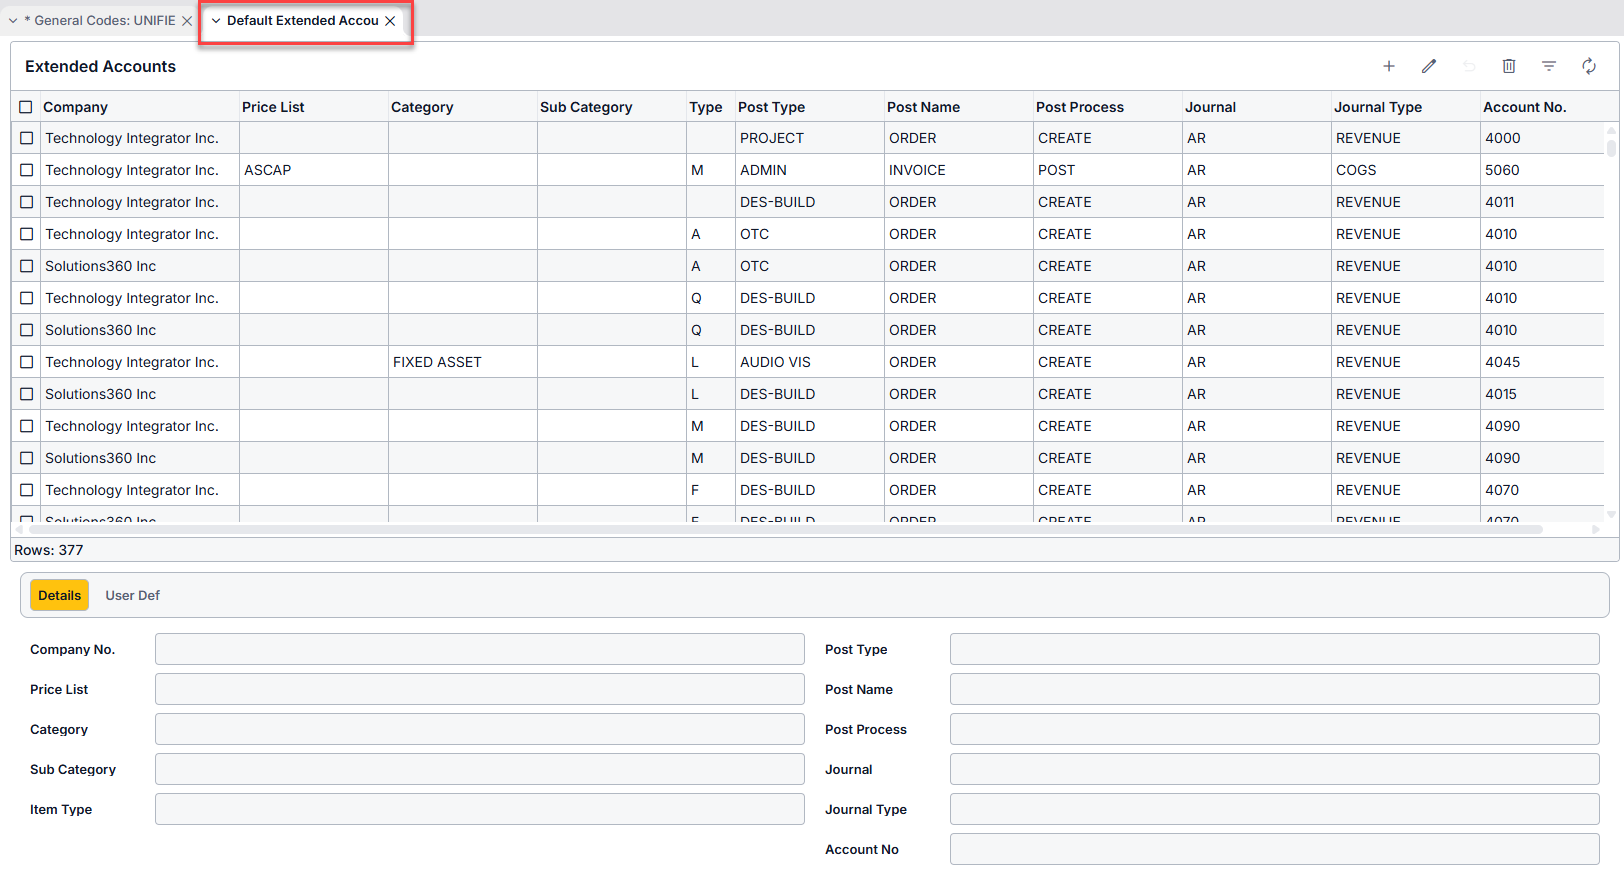
Part 2: Add Default Extended Accounts in Accounting Menu
Configuring Default Extended Accounts involves setting up specific Accounts for the new Sale Type:
- Go to Accounting Main Menu > Admin > GL Admin > Default Extended Accounts
- Use the ADD icon to add new Extended Account rows (typically 18 rows per Company and Sale Type)
- For each Item Type (A, Q, L, M, etc.), including a BLANK item Type, create a minimum of two entries (depending on your process)
- Highlight each new row and either complete the fields for that row using the Details sub tab form below the grid, or double click inside the cell you wish to edit (note” form must be in EDIT mode for this)
- Select Post Type (the new Sale Type you created above)
- Select Post Name (ORDER or INVOICE) – you must assign one each for each Item Type
- Select Post Process (CREATE or POST) – you must assign one each for each Item Type
- Select Journal (this will typically be AR)
- Select Journal Type (REVENUE or COGS) – you must assign one each for each Item Type
- Select Account No. – these are your Company’s GL Account Numbers
- NOTE: see grid pattern in below screenshot – For Post Name ORDER, Post Process should be CREATE and Journal Type should be REVENUE. For Post Name INVOICE, Post Process should be POST and Journal Type should be COGS
- Special instruction for COGS account type:
- Be sure to set appropriate Job Cost Type and / or Job Cost Class for accuracy – these fields will appear in the form below the grid