Defining and Viewing Budgets
User may define multiple budgets for the same date range (e.g., Organizational, Departmental or a mix of cost budgets and income targets)
- Go to Accounting Main Menu > Budgets > Define Budgets. The Budget Search window will open:
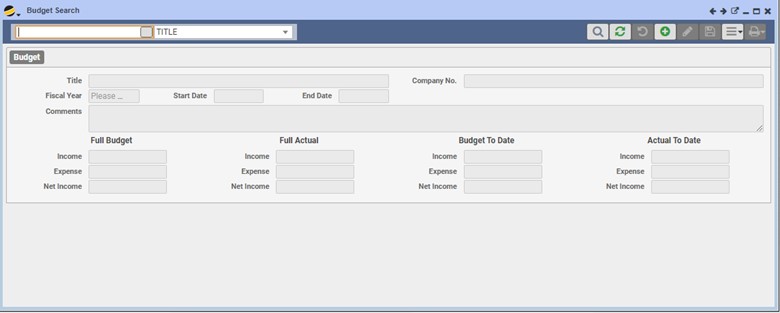
- Click on the ADD (+) button to create a new budget
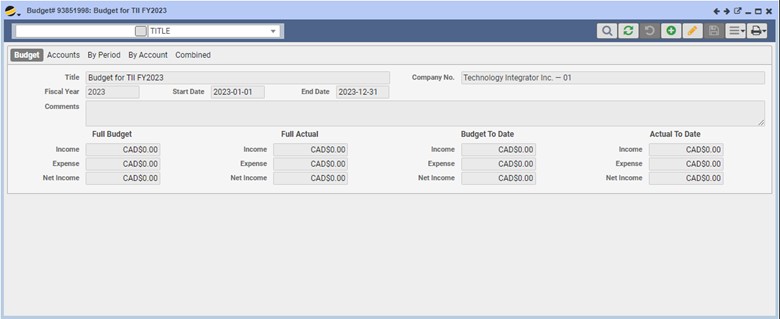
Budget Tab
This tab defines the details for the budget
- Title – Description field to distinguish different budgets. Manual input field
- Company – Defaults to the Company No. defined in Company Setup. Select from the drop-down arrow in a multi-company configuration
- Fiscal Year – Defaults to current year
- Start – Defaults to Start Date of Fiscal Year selected
- End – Defaults to End Date of the Fiscal Year selected
- Comments – Any additional comments. Manual input field
Click the SAVE button when done entering values on the Budget tab to continue with the setup
Sample:
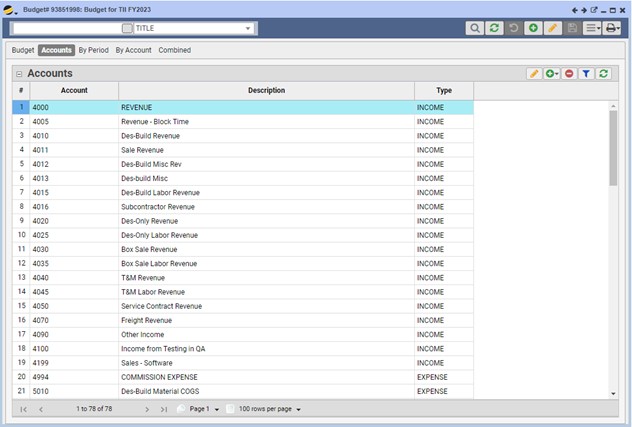
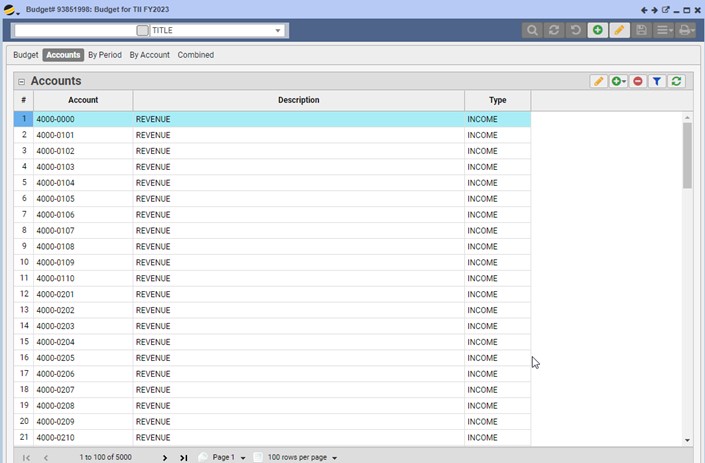
Accounts Tab
This is where the GL accounts and GL segments (if applicable) are defined for this budget. Accounts are listed in numeric order based on the Account values.
- To add GL accounts, click on the ADD button (+) for the following options:
- Add Item – This option will add a blank line to the Account grid. Highlight the row to add details by clicking on the Edit button
- Select All Accounts – This option will auto-populate your budget with all GL Accounts (of type INCOME and EXPENSE as defined in the GL Accounts table)
Sample:
-
- Select One Account – This option will allow you to add one account at a time (of any type) to the grid, Q360 will open the Select an Account window
Sample:
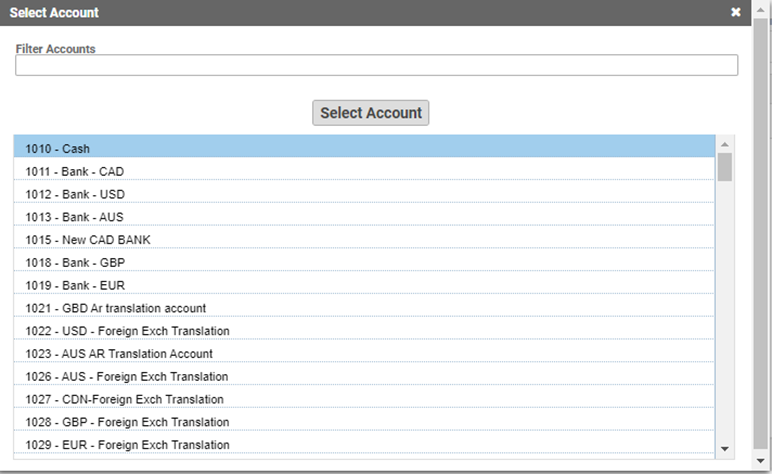
-
- Scroll through the account list and highlight the GL account
- Click the Select Account button
- Q360 will add the selected account to the Accounts grid
-
- Select All Accounts with Segments – This option will auto-populate the grid by creating a Budget account value for each account of INCOME or EXPENSE type and GL Segment combination. e.g. you have two accounts defined and two segments defined: Accounts – 5010, 5020 and Segments – 0101, 0102, then the resulting Budget account values: 5010-0102, 5010-0102, 5020-0101, 5020-0102
Sample:
-
- Select One Account w Segments – Option allows you to select an Account and Segment. Q360 will open the Select an Account window
Sample:
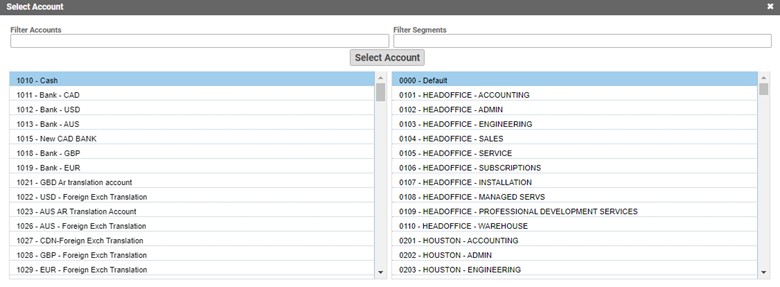
- Highlight the account in the left grid
- Highlight a segment in the right grid (sub account)
- Click the Select Account button when done
- Q360 will add Account + Segment to the Accounts grid
- To remove an Account value, highlight the row (turns the row blue) and click the Delete button
- To edit any Account value, click the Edit button. Account column may be edited by typing in the new value. Description column may be edited by typing in the new value. Type column may be changed by double clicking in the field
- Click the Save button when finished. Click the Undo button to cancel changes
By Period Tab
This tab will help to define the periods (usually months) for this budget.
Once accounts have been defined for the Budget, Q360 also updates the period (based on the Start and End dates defined on the Budget tab). To navigate between periods, select from the Period drop-down menu.
- Add button – Click to build budget period. Q360 will prompt you to confirm your request. Click Yes to continue
- Edit button – Will allow you to edit the Budget column for any account for the period selected on the counter (in other words, allows users to manually add Budget amounts for the GL account)
- Delete button – Will remove the highlighted row from the grid
- Filter button – Will allow you to filter the grid
- Refresh button – Will refresh the By Period grid
Extended Menu Options:
- Update Actual Amounts – Q360 will update the values in the Actual column for each account
- Update Budget Amount From History – Q360 will update the values in the Budget column using the previous 12 months Actuals for the defined GL account
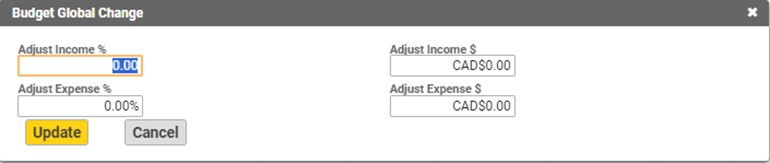
- Adjust Budget Globally – To select this option, you must put the grid in Edit mode
- Adjust Income % – Defaults to 0.00%. Input a percentage to specify the change to be applied to all Income GL accounts
- Adjust Income $ – Defaults to $0.00. Input a dollar value change to be applied to all Income GL accounts
- Adjust Expense % – Defaults to 0.00%. Input a percentage to specify the change to be applied to all Expense GL accounts
- Adjust Expense $ (not labeled) – Defaults to $0.00. Input a dollar value change to be applied to all Expense GL accounts
Click the Update button when done or Click the Cancel button to cancel changes.
Sample:
The By Period Tab grid shows the following details:
- Zoom button – Click to open the Quick Views, Account Detail report for the GL account in that period
- Account – The GL account number
- Description – The GL account description
- Start – The start date for the period
- End – The end date for the period
- Budget – The budgeted amount
- Actual – The actual amount (if you have Updated Actual Amounts from the grid menu)
- % column – Q360 will calculate the difference between the Budget and Actual values and display the difference as a percentage
- Budget Summary – Q360 will calculate these values based on the details found in the Budget column
- Actual Summary – Q360 will calculate these values based on the details found in the Actual column
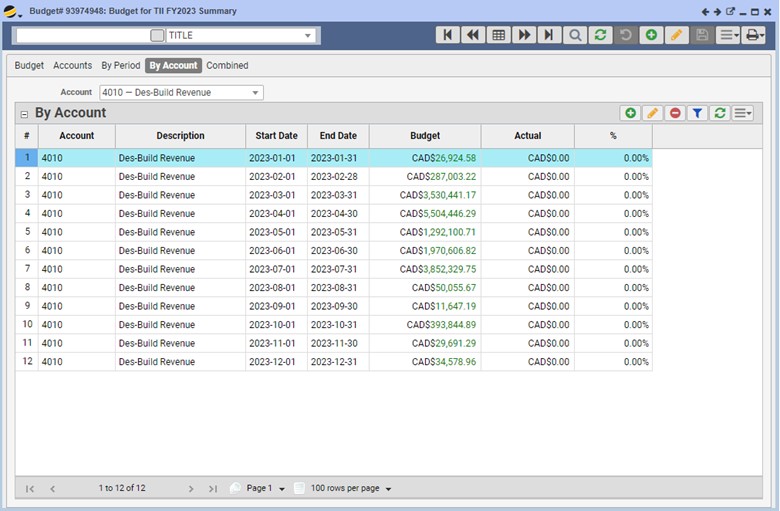
By Account Tab
This tab will display a multi-period budget in a rolled-up view for a single Account. You will see all periods displayed for the selected GL account. To navigate between accounts, select from the Account drop-down menu. You will have the same options available to choose from as the By Period Tab.
Sample:
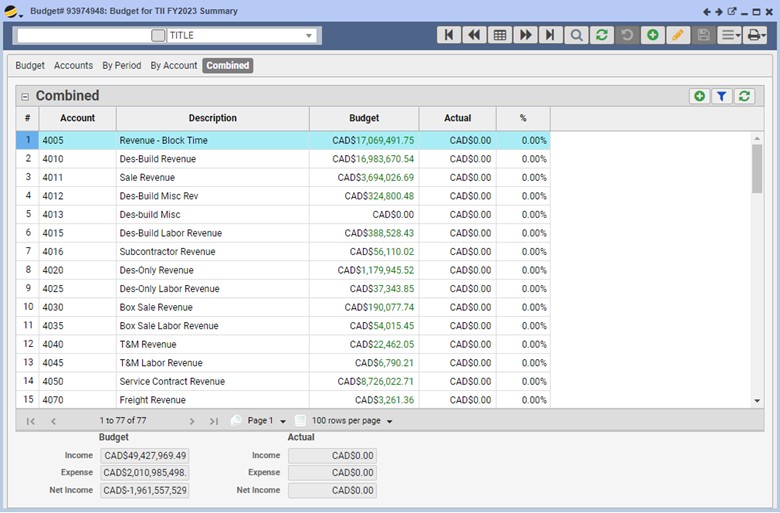
The Combined Tab
This tab will display a multi-period budget in a rolled-up view. For example, if you have a budget for 12 months, the ‘Combined’ view will display one row for each GL account defined for the budget rolled-up into one total for all 12 periods.
Sample:
Extended Menu Options:
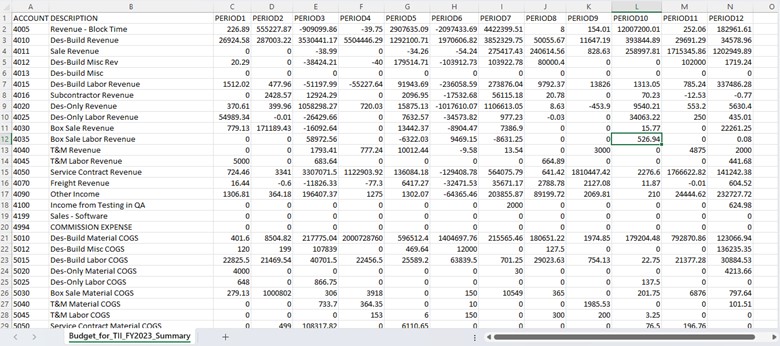
- Export Load Sheet –Click to download an MS Excel load sheet that will serve as a budget template (spreadsheet will contain a list of the GL accounts defined on the Accounts tab). Users can input the values according to the GL account and period
Note: If you have populated the budget (via process button option “Update Budget Amount From History”) then these values will appear in the spreadsheet when exporting.
Sample:
- Import Load Sheet –Click to import the MS Excel budget load sheet (using the Export option first) into Q360. Q360 will prompt for the location of the spreadsheet. Once the file is selected, click Import File. The grid will refresh when the import has completed
- Create New Load Sheet with Segments –Click to download an MS Excel load sheet that will serve as a budget template with segments (sub-accounts). A box will pop-up asking you to choose “Include All Segments” or “Include No Segments” or a drop-down, multi-select option that will allow you to choose certain segments. On the load sheet, users can input the values according to the GL account/segment and period
Sample:

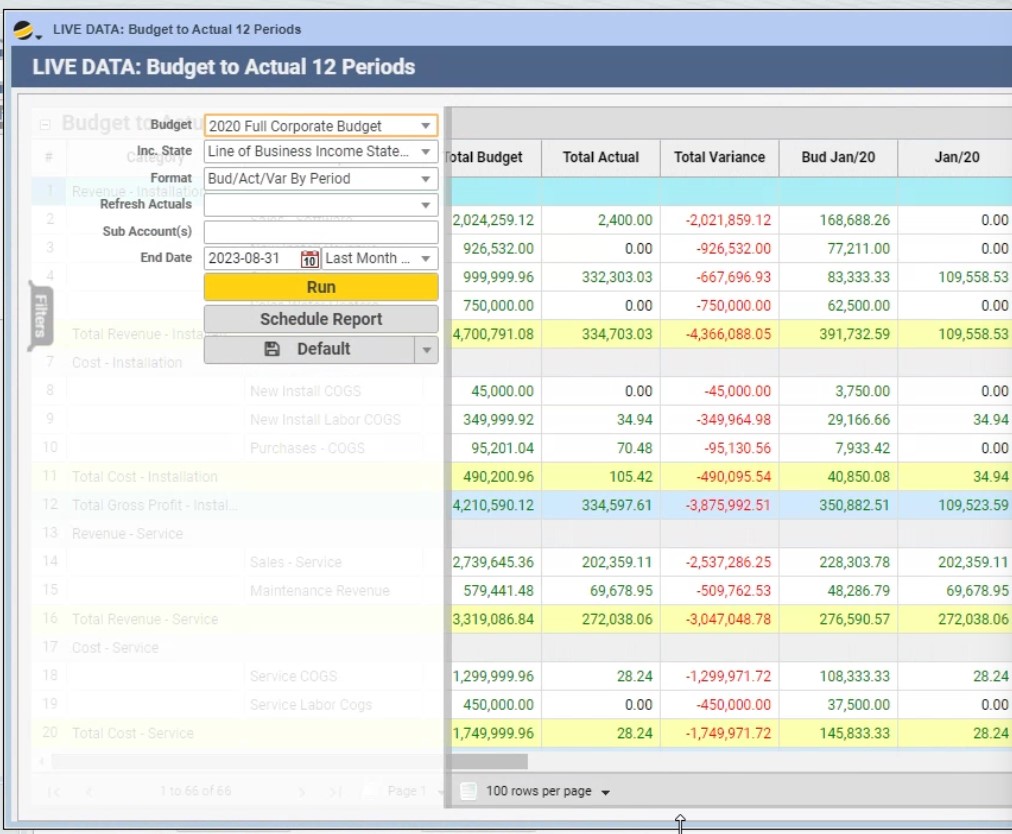
- Compare Budget to Actual 12 Periods (Q0212) – This will generate a Live Data Report displaying all accounts in the budget for 12 periods of the budget. The user can quickly see each period’s budget amount, actual amount, difference, and percentage difference. Columns include Total Budget, Total Actual, and Total Variance.
Sample:
For additional information on why to budget and how to evaluate your current budgeting strategy, see these resources from the National Systems Contractors Association website:
7 Steps to More Proactive Budgeting
Does Your Budget Hold Water? Four Questions to Ask
Full Solutions360 Masterclass: Building a Better Business Through Budgeting