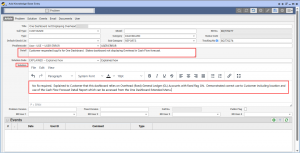
The Knowledge Base in Q360 is a location where Users may reference and add information that assists future Service Users in resolving issues and locating other useful information. Entries may be added (manually) directly to the Knowledge Base, or from an existing Service Call in the system. Note: Knowledge Base entries must be approved before they are available to view by authorized Users
Prerequisites
- Permissions
- SERVMENU (View) – required to see Service Main Menu
- KBASE (View, Create, Edit, Delete) – allows User to view, create, edit and / or delete Knowledge Base entries
- KBEVENT (View, Create, Edit, Delete) – allows User to view, create, edit and / or delete Knowledge Base entries
- KBAPPQ (View) – allows User to view and approve submitted Knowledge Base entries created by other Users
- General Codes
- DISPCAT – KB Categories (see below)
- DISPSUBCAT – KB Sub Categories (see below)
- CALLTYPE or UNIFIEDTYP – KB Call Type (see below)
Create a Knowledge Base Entry – from an existing Call
- Open the Call record and navigate to the Knowledge Base tab. The Knowledge Base grid will display with all current Knowledge Base entries (related to ALL Calls)
- Click the grid Add icon. A pop up window will appear prompting you to “Add this Call to the Knowledge Base?”
- Select Yes or No. If yes, a new Knowledge Base window will open with a KB No. and the Call No. populated with the Call Number
- Note: Knowledge Base Entries created from Calls will be automatically granted Status Code APPROVED
- In Edit mode, enter all available information as in step 2 of the previous section
- Save the form
Create a Knowledge Base Entry – Alternative Method (manually from Knowledge Base)
- From Knowledge Base Search form (Service Menu > Knowledge Base), click the ADD button in the grid. An Add Knowledge Base Entry window will open with a KB No. and Tracking No already populated
- Complete the fields for which you have information. Remember: Call Type, Category, Sub Category and Problemcode and can all be used later to narrow results using drop down menus on the Knowledge Base Search form
- Best practice: Complete Problem Description and Solution Description fields with future use in mind. Keyword searches rely heavily on information in these two fields. Include as much detail as possible and double check spelling
- Public Flag: Check the Public flag if you would like External Users to be able to see this Knowledge Base Entry
- Best practice: Complete Problem Description and Solution Description fields with future use in mind. Keyword searches rely heavily on information in these two fields. Include as much detail as possible and double check spelling
- Save the form
Approve a Knowledge Base Entry
After a knowledge base entry is entered into Q360, it must be approved in order for it to be visible to Users. All users who approve Knowledge Base Entries must have the KBAPPQ (view) permission
- Navigate to Service Main Menu > Work Queues > Knowledge Base Queue. The Knowledge Base Approval Q will open in a new window
- Highlight the Knowledge Base Entry you wish to Approve
- From the Queue Extended Menu, select ‘Add to Knowledge Base’ or, if you do not want to approve the entry, select ‘Remove From Queue’
Search the Knowledge Base
Method 1:
- From a Call record, access the Knowledge Base tab
- Narrow grid results by using the Problem Code, Category or Subcategory fields OR by using the filter icon in the grid (funnel icon). The latter will allow you to search for keywords or specific codes within each column
Method 2:
- Access Knowledge Base Search form via Service Menu > Knowledge Base
- Click the Find button to display all Knowledge Base entries or use search fields to narrow search results
- Keywords – enter a keyword (this will narrow results to only those entries that contain the keyword in ANY column
- Call Type – Select from drop down list (see below for Call Type list logic)
- Category – Select from drop down list (options on this list populate based on General Code DISPCAT)
- Sub Category – Select from drop down list (options on this list populate based on General Code DISPSUBCAT)
- Problemcode – Select from drop down list (options on this list populate based on Problem Codes in Maintenance Menu > Problem Codes)
- Note that the above may result in missing search results when searching for entries using the Call Type drop down menu. Alternatively, users may retrieve the entire KB entry list by pressing the ‘Find’ button, and then narrow the results using the grid filter options (funnel icon on grid)
Knowledge Base Call Type List Logic:
Call Type drop down list is populated based on EITHER General Code = CALLTYPE OR General Code = UNIFIEDTYP. This is dependent upon the UNIFIEDTYP Config
- If Config UNIFIEDTYP = OFF, KB Call Type list will include all General Code CALLTYPE values
- If Config UNIFIEDTYP = ON, KB Call Type list will include all General Code UNIFIEDTYP values where Create Type is ‘CALL’ or Blank
Send an Email from a Knowledge Base Entry
- Open a Knowledge Base Entry and navigate to the Email tab
- Click the Add icon in the Emails grid. A Send Email window will open
- Archive Flag: check this box if you wish to record the email in the Email grid
- The Knowledge Base Entry Title and Tracking No. will auto populate in the Subject line
- The Sender Email will auto populate, but may be changed if you have more than one email address associated with your User record. select from drop down menu
- Recipients: start typing in field and select from list, or click search icon and use search fields to locate recipient
- Attach Documents:
-
- Drag and drop files into “drop files here” field
- Browse your device for a file
-
- Type body of email into text field
- Click Send button to send email