In Q360, adding a new sale type involves two crucial steps: modifying the General Codes > Unified Type under the Maintenance menu to incorporate a new sale type and configuring Default Extended Accounts in the Accounting menu. Creating and integrating new sales types into Q360 facilitates streamlined operations and accurate data management.
Part 1: Modify Unified Type in General Codes
Add a new Sale Type:
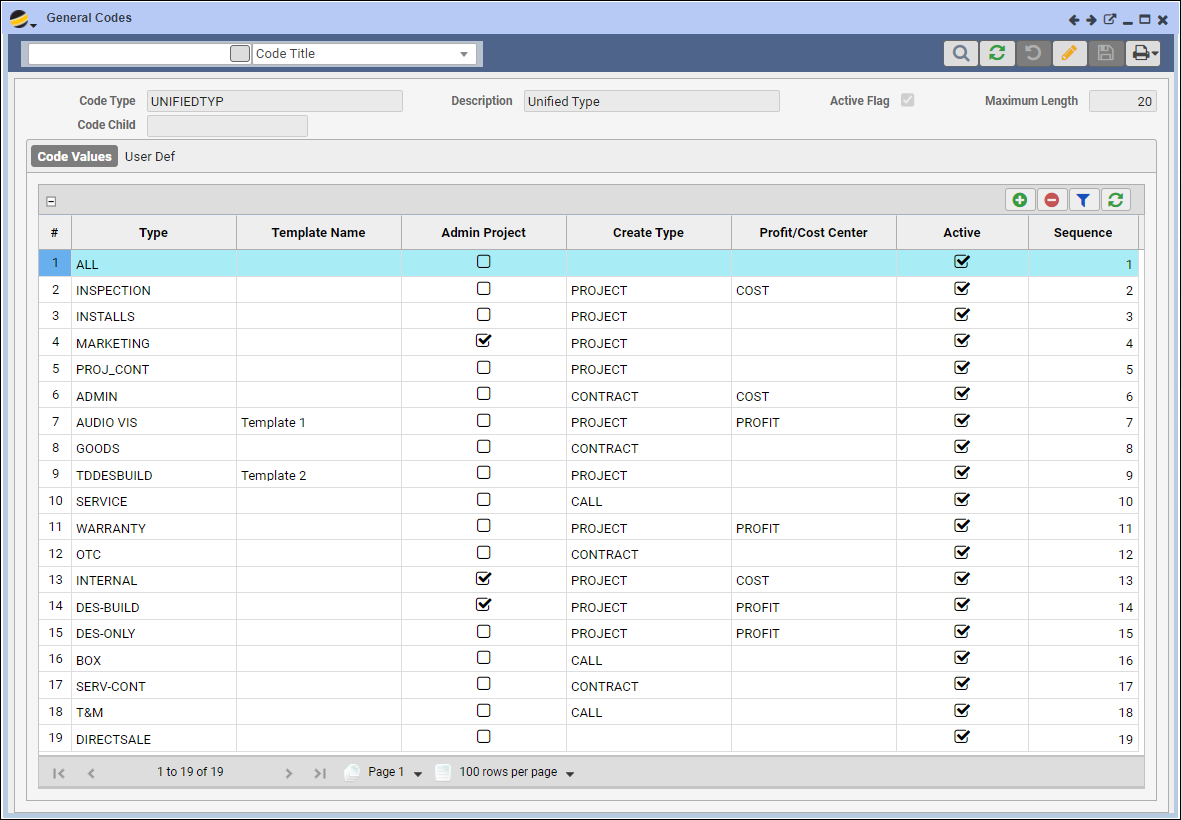
- Go to Maintenance Menu > General Codes
- Search for UNIFIEDTYP in the General Codes form. A list of existing Unified Type Code Values will display in the grid
- Put the grid in EDIT mode and click the ADD (+) button
- Enter information on the new row:
- Type Name: Determines the values that may be selected from the Sale Type drop down menu on a Opportunity, Quote, or Order
- Optional – Project Template Title: If the new Unified Type is intended to create a Project from a template, specify a Project Template Title that will be used when approving the Order. Note: Q360 will NOT prompt you to select a template upon approving the Order
- If the new Unified Type is intended to create an Admin Project, select Y in the Admin Project column to indicate that the resulting Project should be Internal
- Create Type column: indicate what should be created when an Order is approved. Options include Project, Call, Contract (Service Contract), or Blank (will remain as an Order only)
- Profit / Cost Center column: Set this to Profit if the Unified Type is a type of sale to customers, or Cost if this is an internal sale type
- Active column: Check the box if the selected type should be displayed in the Sale Type drop down menu of the Opportunity, Quote, and Order forms
- Sequence field: determines the order in which Type options appear in the Opportunity, Quote and Order Sale Type drop down menus. This option is purely aesthetic
- Click SAVE button
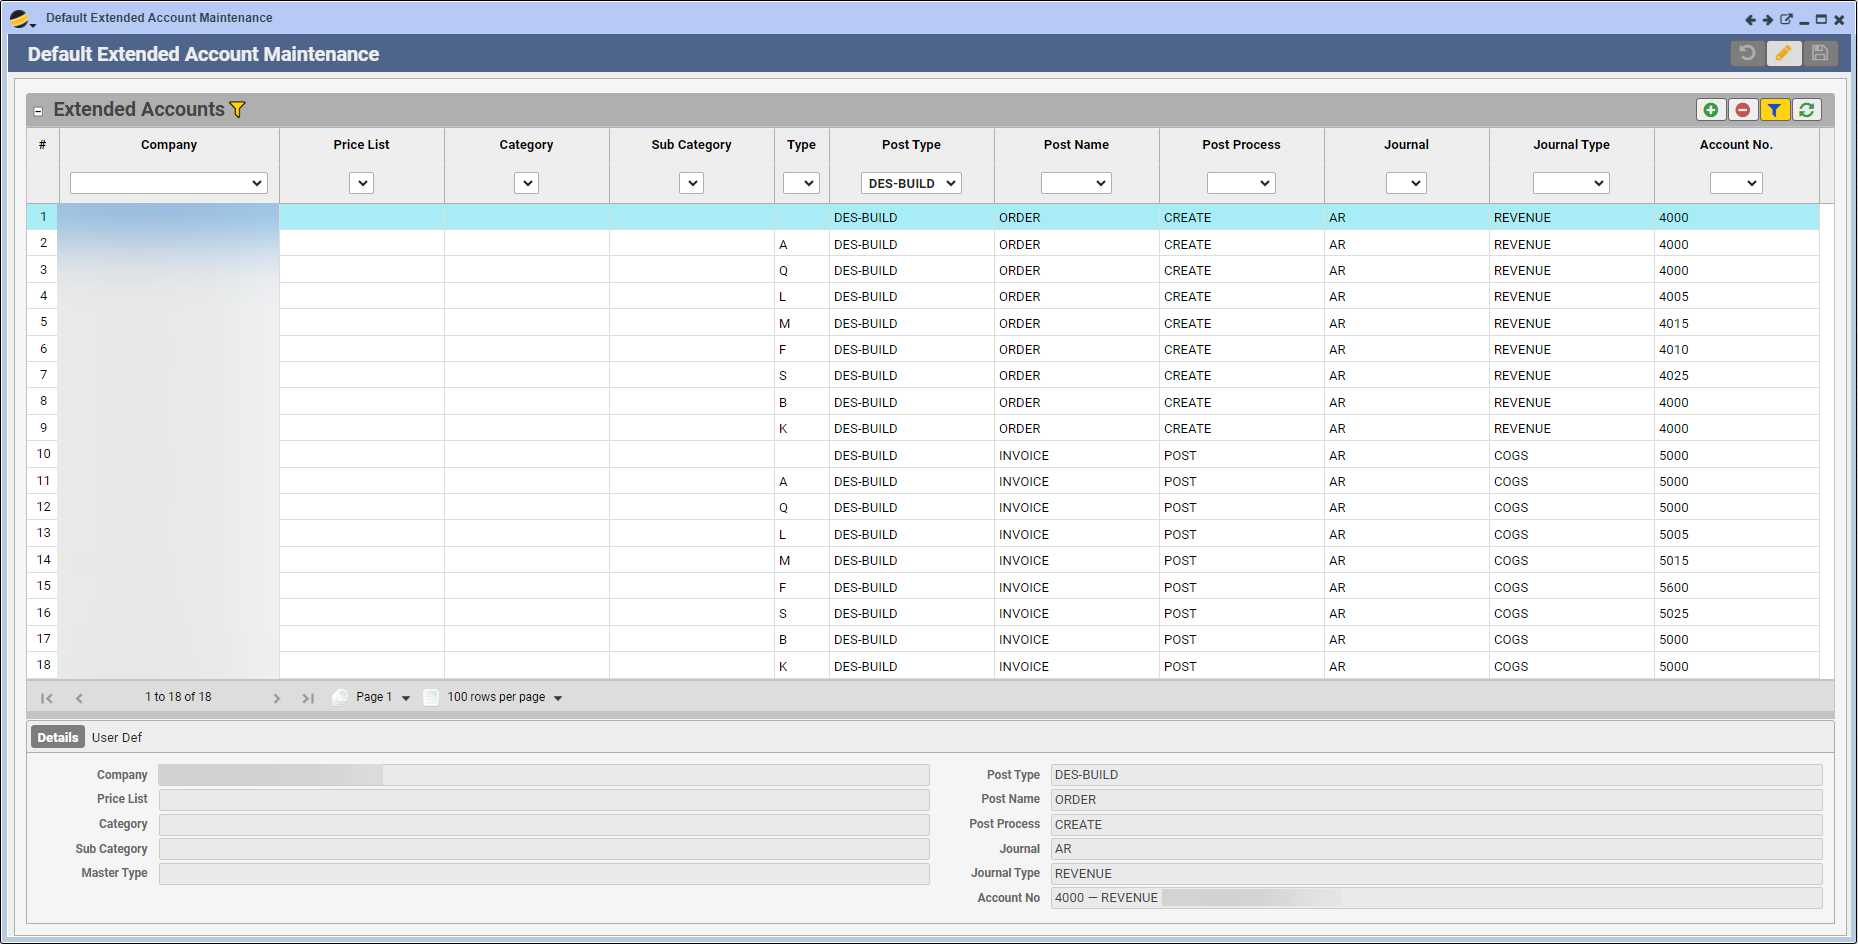
Part 2: Add Default Extended Accounts in Accounting Menu
Configuring Default Extended Accounts involves setting up specific accounts for the new Sale Type:
- Go to Accounting Menu > Admin > GL Admin > Default Extended Accounts
- Place the form in EDIT mode
- ADD new Extended Account rows (typically 18 rows per Company and Sale Type)
- For each item Type (A, Q, L, M, etc.), including a BLANK item Type, create a minimum of two entries (depending on your process)
- Highlight each new row and either complete the fields for that row using the form below the grid, or double click inside the cell you wish to change
- Select Post Type (the new Sale Type you created above)
- Select Post Name (ORDER or INVOICE) – you must assign one each for each item Type
- Select Post Process (CREATE or POST) – you must assign one each for each item Type
- Select Journal (this will typically be AR)
- Select Journal Type (REVENUE or COGS) – you must assign one each for each item Type
- Select Account No. – these are your company’s GL Account Numbers
- NOTE: see grid pattern in below screenshot – For Post Name ORDER, Post Process should be CREATE and Journal Type should be REVENUE. For Post Name INVOICE, Post Process should be POST and Journal Type should be COGS
- Special instruction for COGS account type:
- Be sure to set appropriate Job Cost Type and / or Job Cost Class for accuracy – these fields will appear in the form below the grid