Q360 versions 22.02 + offer new enhancements to the quote process.
To begin using Sections and Subsections within a quote, click on the Line Items tab of a quote. A new Sections area will appear on the left side of the window.
Add Section using Green (+) button:
- Click EDIT button.
- Click green (+) button in Sections area.
- A pop-up window will open where you will name your new section. Enter a name and click Ok.
- Click the green (+) button again to create a subsection. Repeat step 4 to name your subsection.
- To link this second section as a subsection of a section, locate the second section in the left Section area, click on it and drag it to the Section to which it should be attached.
- Repeat subsection process as many times as needed. Sections and subsections may be nested within one another to whatever level is required.
Note: Q360 will respect Sectioning, grouping and sequencing of sections and subsections when printing a quote.
Add items to a Section or Subsection:
- Highlight Section or subsection to which you wish to add items.
- Click on the Find Product tab on the left within the Sections area.
- Use the Search box or Advanced Search options to find products. Add product by clicking the black (+) button next to the item in the Parts grid.
- Click SAVE button when you have finished adding items to your sections and subsections.
Note: Kits (K type items) behave differently when added to a quote. They will appear as a separate section containing all items kitted together. If this kit belongs within another section, simply drag and drop the items into that section and delete the kitted section (now empty).
Add Section using Quick List:
- Click the EDIT button.
- Within the Sections area, click on the Quick List subtab (left side). A list of previously created Quick Lists will appear in the Sections area.
- Add a Quick List to the quote by clicking the black (+) button next to the chosen Quick List. Quick Lists may also be added to existing sections or subsections by highlighting the section or subsection to which the Quick List should be attached.
- A pop-up window will appear asking you to choose the Cost Source and Price Source. Make your selections and then click Add.
- A pop-up window will appear asking “Would you like to create a new section for this quick list?” Click Yes. The Quick List you selected will appear in the Line Items grid as it’s own section which may be renamed, moved, or nested within the grid using the Sections area as described above.
- Save
Quantity Function (Section Multiplier):
It is not necessary to add numerous identical sections item by item to a quote. The Qty column of the line items grid is editable when the grid is in Edit mode. Double click in the Qty column next to the section you would like to multiply and enter the number of identical sections you would like the quote to contain. The Ext Qty column will then display the total number of each item included in the quote. Save.
Note: Both sections and subsections may be multiplied using this option.
Grouping Items (using Group columns):
- Click the Edit button.
- Click the black + above the Line Items grid to expand all sections and subsections.
- In Extended Menu of Line Items grid, click Update Group Fields by Section.
- A pop-up window will open asking “Which group field do you want to update?” Select “Dynamically by section depth” from the drop-down menu and click Confirm. This option recognizes that the overarching section is the ‘main’ section for the quote and assigns this section to the Group 1 column. Subsequent level 2 subsections are grouped within the Group 2 column, level 3 subsections are grouped within the Group 3 column and so forth.
- Save
Note: Grouping on the quote level will be maintained through to the Material tab of a project created from this quote.
Quotes will process forward to projects as they always have, using the Process button.
Once your quote has been converted to an order, you will notice that sections that were multiplied on the quote have been split into separate line items. These may be renamed at this point if needed. Subsections under each section have carried over to the order and may be viewed by expanding the sections. Subsections may be renamed at this point if needed.
Printing Proposals and Quotes with Sections:
Printing Proposals and Quotes with Sections follows the same path to print options: Sales > Opportunity > Print Button > Print Quote.
Upon selecting Report Template “Standard Proposal – Sections,” user will be presented with print Parameter, Destination and Format options:
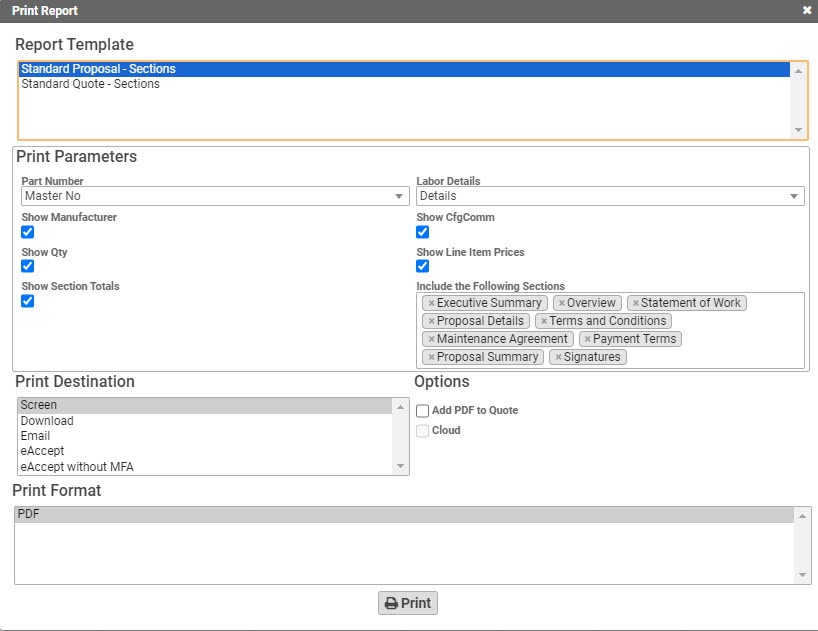
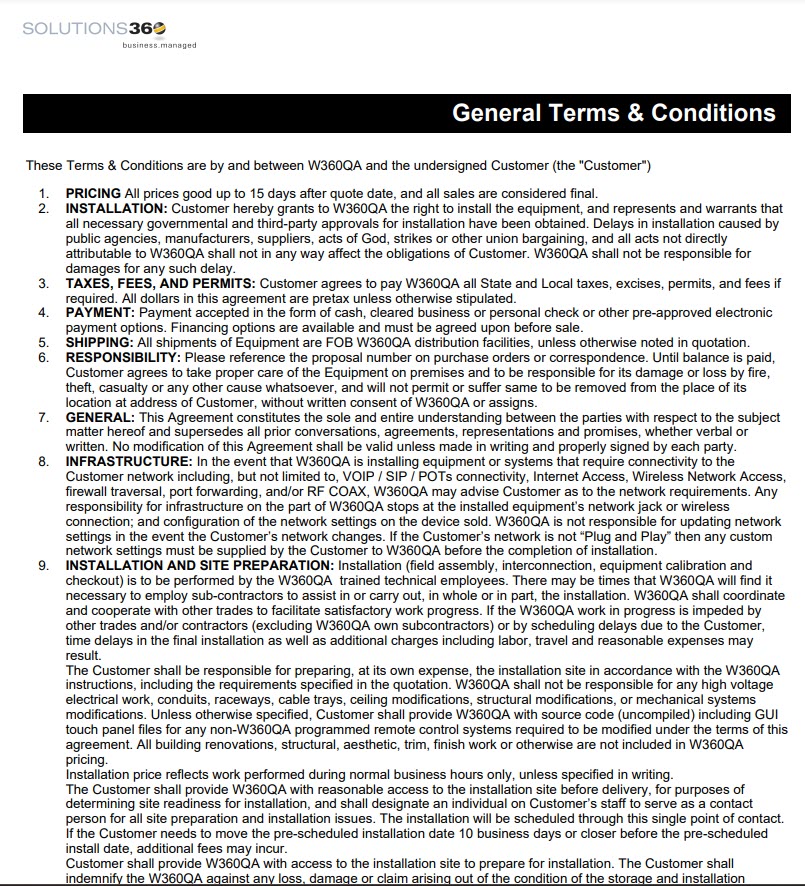
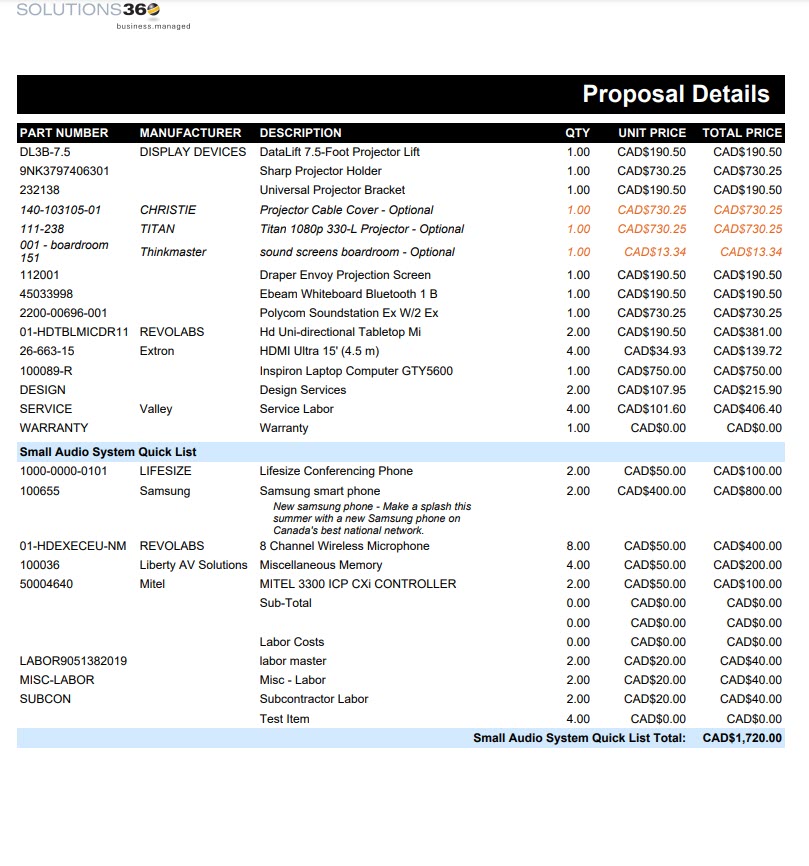
Sample Proposal output:

Upon selecting Report Template “Standard Quote – Sections,” user will be presented with print Parameter, Destination and Format options:
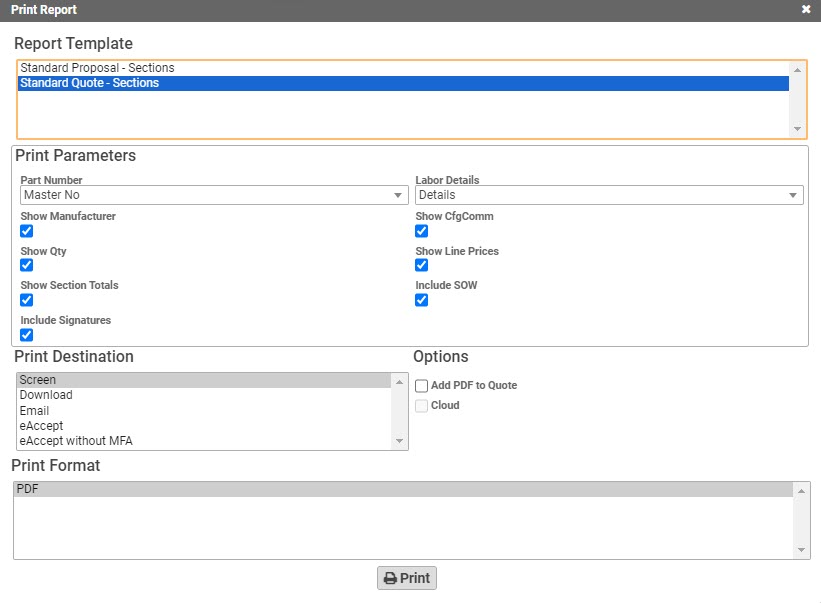
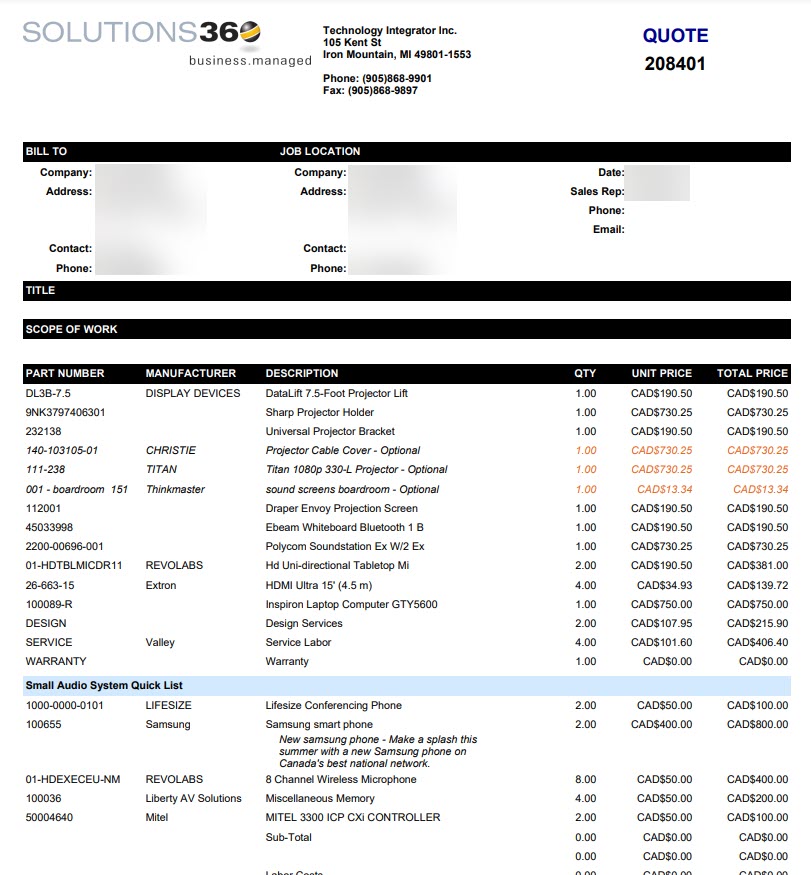
Sample Quote output:
Note: a proposal will typically include significantly more information than a quote.


